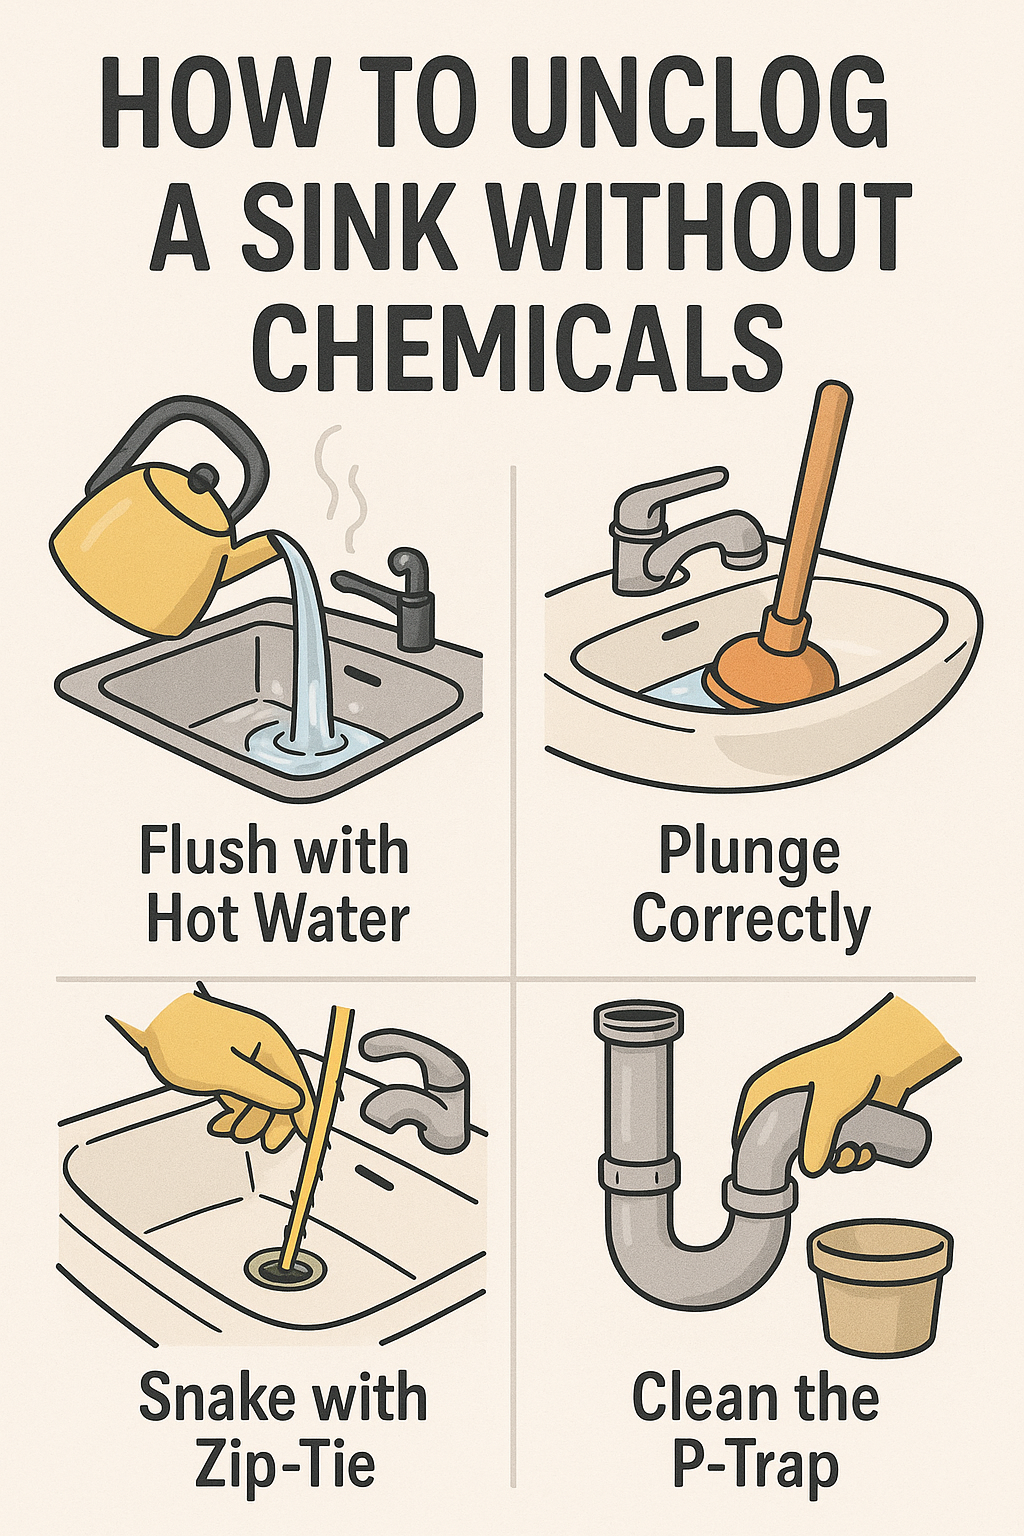
How to Unclog a Sink Without Chemicals
by Abdulrasaq • DIY Guides • August 10, 2025
Slow drain, standing water, or that swampy smell-yeah, a clog is brewing. The good news: most sink clogs can be cleared without harsh chemical drain cleaners. Grease, soap scum, toothpaste sludge, and especially hair (bathroom) are the usual suspects. Below are the safest, most effective methods you can do with basic tools and household items. Start at the top (fastest), then move down the list if the clog is stubborn. You’ll fix it once-and learn the tricks to prevent it from coming back.
What You’ll Need
- Rubber gloves, bucket or bowl, and old towels
- Very hot water (kettle or hottest tap); avoid pouring boiling water into PVC
- Cup plunger (sink plunger) - different from a toilet plunger
- DIY drain snake (long zip-tie with notches) or a small auger
- Optional wet/dry vacuum (if you have one)
- Adjustable wrench to open the P-trap (under-sink U-bend)

Step 1 - Clear Standing Water & Prep
- Bail out excess water into a bucket so you can work directly on the drain.
- Remove the sink stopper or strainer. Hair often wraps here-clean it thoroughly.
- For bathroom sinks, cover the overflow hole with a wet cloth for better plunging later.
- For double-bowl kitchen sinks, seal the other drain with a wet rag so pressure stays where you plunge.
Step 2 - Flush With Hot Water
- Run the tap on hottest or pour a kettle of very hot water (not boiling on PVC) straight into the drain.
- Wait 30–60 seconds, then repeat two more times. This softens grease and breaks down soap scum.
- If water drains better already, do a 1–2 minute hot flush to finish.
Step 3 - Plunge the Right Way
- Seat a cup plunger flat over the drain. Add a little water to cover the plunger cup.
- Plunge firmly 10–15 times. Keep your overflow sealed. Lift to test flow; repeat up to 3 cycles.
- If it burps and drains, run hot water for 1–2 minutes to flush loosened gunk.
Step 4 - Snake the Drain (DIY or Auger)
- Make a DIY snake: take a long zip-tie and snip small backward-facing notches along both sides. (Or use a store-bought mini auger.)
- Feed it into the drain and twist while pulling back slowly to hook hair and sludge.
- Repeat until the snake comes up cleaner, rinsing it between passes.
Step 5 - Wet/Dry Vacuum (If Available)
- Set the vacuum to liquid mode. Place the hose directly over the drain and seal with a wet cloth.
- Run 10–15 seconds to pull the clog toward the top. Empty the canister and repeat if needed.
Step 6 - Clean the P-Trap
- Place a bucket under the U-shaped trap. Loosen the slip nuts by hand or with a wrench and remove the trap.
- Knock debris into the bucket, then rinse the trap in another sink or outside. Check the short pipe going into the wall too.
- Reassemble, ensuring the rubber washers seat properly. Hand-tighten, then add a gentle quarter-turn with the wrench-don’t overtighten.
Step 7 - Final Flush & Leak Check
- Run hot water for 1–2 minutes. Watch the trap for leaks. If you see a drip, snug the slip nuts very slightly.
- Reinstall the stopper/strainer and confirm smooth drainage.
Prevention Tips (They Work)
- Catch hair/food: Use a mesh strainer. Clean it daily.
- Grease rule: Never pour fats/oils down the sink. Wipe pans with a paper towel first.
- Weekly hot flush: Run very hot water for 30–60 seconds after brushing teeth or washing greasy dishes.
- Stopper care: Hair wraps around the stopper arm-pull and clean it weekly.
When to Call a Pro
- Multiple fixtures back up at once (possible main line issue).
- Gurgling sounds or sewage odors from other drains.
- Clogs return within days even after a good cleanout.
Common Mistakes to Avoid
- Boiling water on PVC: Use very hot, not rolling-boil, to avoid softening fittings.
- Toilet plunger on sinks: Use a cup plunger for flat drains.
- Overtightening trap nuts: Can crack plastic threads or deform washers.
- Mixing chemical cleaners: Skip harsh drain chemicals; they can be dangerous and damage pipes.