Remove a Wall Anchor and Repair the Hole
by Abdulrasaq • DIY Guides • August 10, 2025
Taking down shelves, curtain rods, or TV cables often leaves ugly wall anchors behind. If you yank them out the wrong way, you can shred the drywall paper and end up with a bigger repair than you planned. This guide shows you how to identify the anchor type, remove or sink it without tearing the wall, and then patch the hole so it disappears under paint. The process takes less than an hour of hands-on time and only basic tools.
Know Your Anchors (30-Second ID)
- Plastic expansion anchor: A smooth plastic sleeve. Used with light screws for small loads.
- Molly bolt (hollow-wall anchor): A metal sleeve with tiny teeth around the flange. Expands behind the wall when tightened.
- Toggle bolt: A machine screw with spring wings. After you remove the screw, the wings fall inside the wall.
Tools & Materials
- Screwdriver (to thread into anchors or remove screws)
- Pliers (needle-nose or regular)
- Utility knife (for trimming and beveling paper)
- Putty knife (2–4 in / 5–10 cm)
- Spackle or lightweight joint compound
- Fine-grit sanding block (180–220)
- Primer + matching wall paint; painter’s tape (optional)
- Self-adhesive mesh patch (only for large toggle holes)
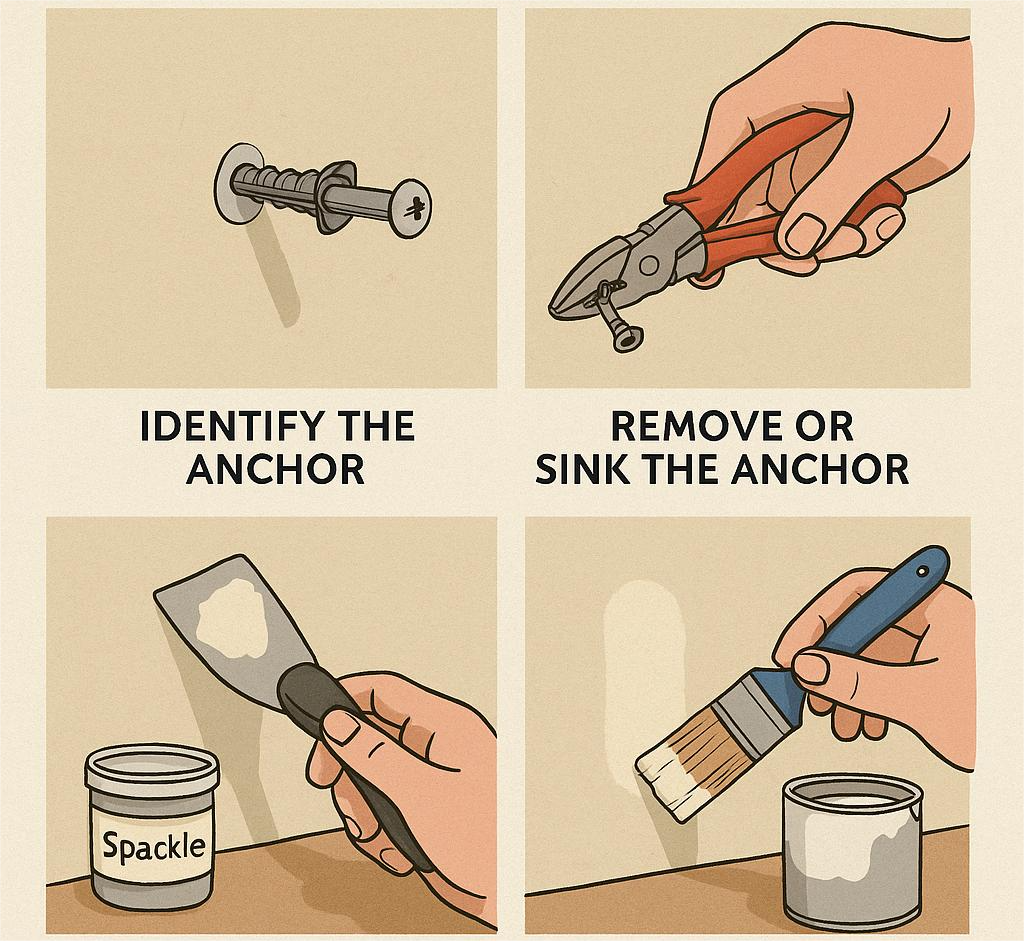
1) Remove or Sink the Anchor
The right move depends on the anchor. The goal is a clean hole with firm edges for patching.
Tip:
- Before pulling, thread a screw 2–3 turns into plastic anchors to grab them without crushing the sleeve.
- With molly bolts, sometimes it’s cleaner to collapse the sleeve and pull it out than to push it through.
- Plastic expansion anchor: Drive a screw in a few turns. Grip the screw head with pliers and pull outward while wiggling gently. If the collar mushrooms, use a utility knife to score around the flange first.
- Molly bolt: Back out the screw completely. If the collar is flush, place your putty knife under the flange and pry slightly while pulling with pliers. If it won’t budge, tap the collar lightly to collapse the legs and ease it out. As a last resort, push the body into the wall cavity.
- Toggle bolt: Unscrew and remove the machine screw; the wings drop inside the wall by design. You’re left with a larger hole to repair.
2) Trim & Clean the Hole
Use a utility knife to cut away fuzzy drywall paper and create a tiny bevel around the hole. This avoids raised edges after patching. Brush away crumbs and wipe with a damp cloth so compound adheres well. If the paper around the hole is torn back to brown, trim to firm paper.
3) Fill: Press, Feather, and Keep It Thin
Press spackle into the hole with your putty knife to remove air pockets, then scrape it flush. Feather the edges by holding the knife at a shallow angle and pulling outward 1–2 inches beyond the hole. Thin layers dry flatter and don’t crack as they cure.
- Toggle-sized holes: If the hole is 1/2–3/4 in (12–19 mm) or larger, place a self-adhesive mesh patch over the spot first, then skim compound over it.
- Compound choice: Quick-dry spackle is convenient; setting-type compound is harder and better for larger holes but sets quickly-mix small amounts.
4) Dry, Sand, and Skim Again (If Needed)
Let the patch dry fully (check the label; many spackles are ready in 20–60 minutes). Sand with 180–220 grit using light, broad strokes so you don’t carve a divot. Run your fingertips across the area-if you feel a ridge or dip, apply a thin skim coat, feather wider, dry, and sand once more.
5) Prime & Paint for an Invisible Finish
Unprimed spackle flashes through paint. Spot-prime the repair and an inch around it, then paint with the same sheen as the wall (flat, eggshell, satin, etc.). Blend the edges by rolling or brushing slightly beyond the primed area to avoid a hard line.
When Pushing Through Is Okay
If a molly or plastic anchor refuses to pull cleanly and you risk tearing a big ring of paper, it’s acceptable to push it into the cavity. You’ll still trim the hole clean and patch, and no one will ever know. Avoid this near electrical boxes or where the cavity is obstructed.
Safety & Smart Checks
- Wires & pipes: Anchors are usually placed away from studs, but stay gentle. If you feel resistance beyond drywall, stop.
- Lead paint / old plaster: In very old homes, avoid aggressive sanding; use light hand-sanding and containment.
- Moisture stains: If the area is stained or soft, resolve moisture first and seal with a stain-blocking primer.
Quick Reference (30-Second Recap)
- ID the anchor. Pull plastic with a screw and pliers; collapse or pull molly; remove screw from toggle (wings fall inside).
- Trim fuzzy paper and bevel the edge; wipe dust.
- Press in spackle, feather 1–2 in past the hole.
- Dry, sand smooth, skim again if needed.
- Spot-prime, then paint and blend.
Done right, the anchor disappears and your wall looks brand new. Next time you hang something, consider using a stud or a removable adhesive hook for light decor-future you will thank you.