Why buy expensive transplants when you can start 72 plants for the price of a latte? Here is the foolproof method for indoor seed starting.
Starting seeds indoors gives you a head start on the growing season, especially in cooler climates. It also opens up a world of varieties you simply cannot find at the local nursery. Forget "Better Boy" tomatoes; welcome to the world of "Black Krim" and "Green Zebra".
The Gear You Actually Need
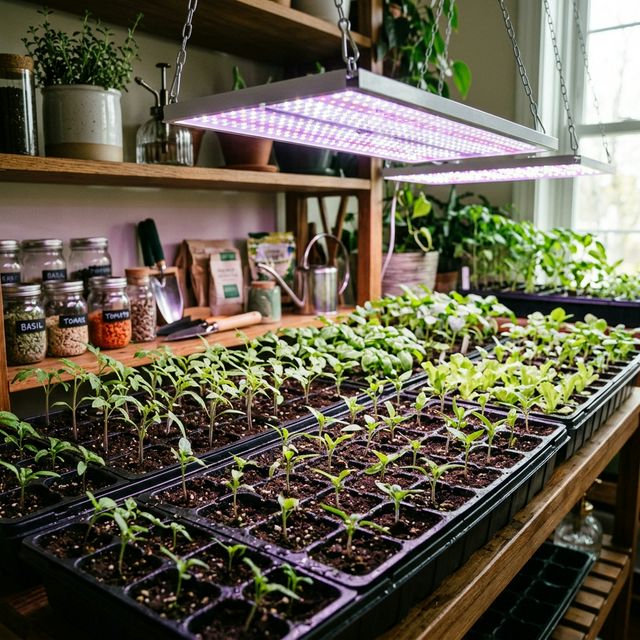
You don't need a greenhouse. You need three things:
- Light: A sunny window is rarely enough. Use a simple shop light or LED grow light (see our guide).
- Heat: Peppers and tomatoes love warm feet. A heat mat speeds germination by 50%.
- Mix: Do not use garden soil! Use a sterile seed-starting mix (coco coir or peat moss) to prevent disease.
The Mechanics of a Sprout: Understanding Germination
Before you bury a seed, you must understand what it needs to "wake up." Germination is a three-stage process:
- Imbibition: The seed absorbs water, causing the seed coat to swell and soften.
- Enzyme Activation: The water triggers internal enzymes that convert stored starches into energy for the growing embryo.
- Radicle Emergence: The first root (radicle) breaks through the coat, followed by the "hook" or stem that reaches for the light.
If you interrupt any of these stages—by letting the soil dry out for even an hour—the seedling will likely fail. Consistency is the secret to a 100% germination rate.
DIY Seed-Starting Mix Recipes
Commercial seed starting mixes are often overpriced. You can make a professional-grade sterile medium at home for a fraction of the cost:
The Urban Professional Mix
- 2 Parts Coco Coir (Sifted)
- 1 Part Perlite (Fine grade)
- 1 Part Vermiculite
- (Optional) 1/2 Part finely sifted worm castings (for a slow nitrogen release)
Pro Tip: Always pre-moisten your mix before filling your trays. If you try to water dry coco coir after planting, the seeds will just float to the surface or get buried too deep.
Timing is Everything
Start too early, and you have giant, leggy monsters. Start too late, and you miss the harvest.
General Rule of Thumb:
- Peppers/Eggplant: 8-10 weeks before last frost.
- Tomatoes: 6-8 weeks before last frost.
- Lettuce/Greens: 4-5 weeks before last frost.
- Cucumbers/Squash: 2-3 weeks (or direct sow).
Preventing the "Damping Off" Disaster
One day your seedlings look perfect; the next morning, they've collapsed at the base and died. This is Damping Off, a fungal disease caused by Pythium or Rhizoctonia. It thrives in cold, wet, stagnant conditions.
How to Stop It:
- Airflow: Use a small fan to keep the air moving around your seedlings once they emerge.
- Cinnamon Power: A light dusting of Ceylon cinnamon on the soil surface acts as a natural antifungal agent.
- Chamomile Tea: Watering with cooled chamomile tea provides mild antifungal properties that protect sensitive stems.
Watering Your Seeds: The Bottom-Water Method
Never spray or pour water directly on top of tiny seeds, as it easily dislodges them or buries them too deep into the soil. Instead, use the bottom-watering technique. Place your seed-starting cells inside a solid, waterproof tray. Pour an inch of water into the bottom tray and allow the capillary action of the soil mixture to slowly absorb the water upwards. Once the surface looks damp, remove the remaining water to prevent roots from suffocating.
Labeling and Tracking Your Varieties
You might think you will remember which row contains the jalapeños and which contains the mild bell peppers, but within a week, all green shoots look absolutely identical. Always use plastic or wooden plant markers written on with a permanent garden marker. Better yet, create a small map or spreadsheet of your starting trays to double-check against faded labels.
Troubleshooting: Mold, Algae, and Slow Germination
If you see a fuzzy green algae or white mold forming on the surface of your seed starting mix, you are keeping the soil too wet and the air too stagnant. Scrape the surface gently, let the tray dry out slightly, and increase air circulation immediately.
If your seeds are taking forever to germinate, the culprit is usually low temperatures. Ensure your heat mat is functioning and verify that drafty windows aren't pulling the ambient temperature down at night.
The "Hardening Off" Process for Balconies
Indoor seedlings have never felt wind or direct UV rays. Their "skin" (cuticle) is thin and weak. You must toughen them up before moving them to your balcony or rooftop garden forever.
The 7-Day Schedule:
- Day 1-2: Place them in a completely shaded, sheltered spot for 2 hours, then bring them back in.
- Day 3-4: 3-4 hours of dappled sunlight. Avoid the harsh 12 PM - 3 PM sun.
- Day 5-6: Full sun for 5 hours, but continue to bring them in at night if temperatures drop below 55°F.
- Day 7: Leave them out all day and overnight (if weather permits).
The Penny Hack for "Leggy" Seedlings
If your seedlings look tall, thin, and pale (leggy), they are stretching for light. While you should lower your lights immediately, you can also support them by gently "mounding" some extra seed-starting mix around the stem. Another trick: place a penny at the base of the plant. The copper in the penny acts as a mild fungicide and the physical barrier encourages the stem to thicken up as it grows around the obstacle.
Conclusion
Seed starting is specific, but rewarding. It connects you to the entire lifecycle of your food. Plus, seeing that first loop of green break the soil never gets old.