Unlock the power of "living multivitamins." Learn how to grow nutrient-dense microgreens from seed to harvest in just one week.
If you have a windowsill and seven days, you have enough to start your own high-yield urban farm. Microgreens are young vegetable greens that are approximately 1–3 inches tall. Why would you harvest them so early? Because at this stage, they contain up to 40 times more nutrients (like Vitamin C, E, and K) than their mature counterparts.
Why Grow Microgreens?
Beyond the nutritional punch, microgreens are the fastest crop you can grow. They require zero fertilizer, minimal light compared to fruiting plants, and can be grown year-round even in flightless basements. They are the perfect entry point for the urban gardener who wants immediate results.
1. The 7-Day Timeline: Seed to Salad
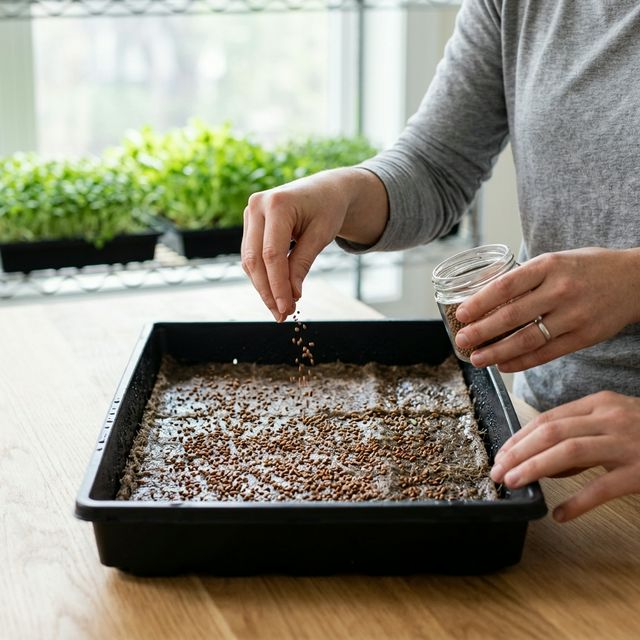
Success in microgreens is all about timing and seeding density. Unlike outdoor gardening where you space plants inches apart, microgreens are sown as a "carpet." For a standard 10x20 tray, you should aim for about 1-2 ounces of small seeds (like broccoli) or 4-6 ounces of large seeds (like peas).
Nutritional Powerhouse: A Comparison
Why choose microgreens over their mature counterparts? Here is a quick breakdown of why these tiny plants are so effective:
| Vegetable | Nutrient Boost | Key Benefit |
|---|---|---|
| Red Cabbage | 6x Vitamin C | Immune Support |
| Cilantro | 3x Beta-Carotene | Eye Health |
| Radish | 4x Vitamin E | Skin & Heart |
Here is what your first week will look like:
- Day 1: Seeding & Blackout. Spread your seeds thickly across a damp growing medium. Cover them with a weighted tray or a dark lid to simulate soil pressure. This encourages strong, deep roots.
- Day 2-3: Checking. Keep the lid on. The seeds will sprout (germinate) in the dark, stretching upward in search of light. Mist them once a day if the medium feels dry.
- Day 4: Into the Light. Remove the cover. Your sprouts will likely look pale yellow—this is normal. Once hitting the light (even a simple LED or sunny window), they will turn vibrant green in hours.
- Day 5-6: Growing. The "cotyledons" (the first set of leaves) will expand. This is when the nutrient density is at its peak.
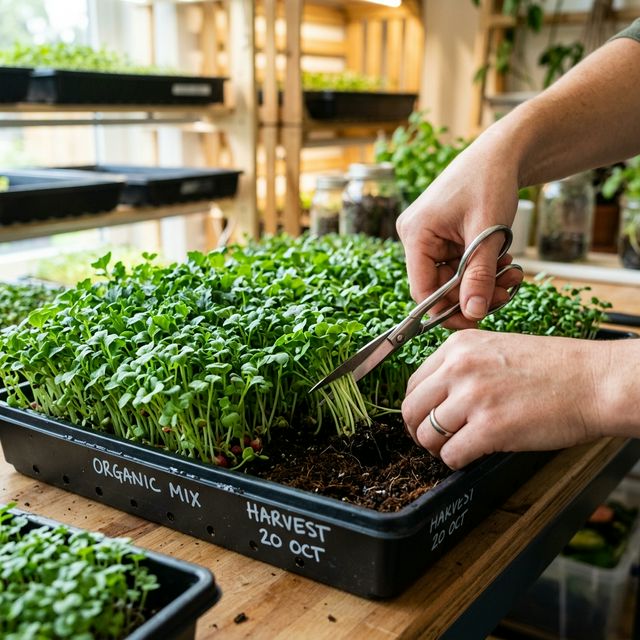
- Day 7: Harvest. Use sharp scissors to snip the greens just above the soil line. Rinse, dry, and enjoy!
Pro-Tip: Choosing Your Growing Medium
You don't need expensive soil. Many pros use hemp mats or coconut coir. These are clean, renewable, and make harvesting much less messy since there's no dirt to wash off your delicate greens.
2. Best Varieties for Beginners
Not all seeds are created equal. Start with these "unkillable" varieties:
- Radish: The easiest and fastest. They have a spicy kick and are ready in as little as 5 days.
- Broccoli: Mild flavor and incredibly high in sulforaphane (a potent antioxidant).
- Pea Shoots: Sweet, crunchy, and large enough to be used as a base for a full salad.
- Sunflower: Nutty and substantial, but they require a 12-hour soak in water before planting.
3. Troubleshooting: Humidity and Mold
The biggest enemy of microgreens is "Damping Off"—a fungal disease caused by poor airflow and high humidity. Because you are planting seeds so densely, air cannot circulate between the stems easily.
- The Fix: Use a small desk fan to keep air moving around your trays.
- Bottom Watering: Instead of misting from the top (which keeps leaves wet), place your growing tray in a slightly larger tray filled with half an inch of water. The medium will soak it up from below, keeping the leaves dry.
- H2O2 Spray: If you see fuzzy white mold, a light misting of 3% food-grade hydrogen peroxide will kill the fungus without harming the plants.
4. The Science of "Phytochemicals"
Why are microgreens so healthy? During germination, the seed releases its entire store of energy to create those first leaves. This includes a concentrated burst of polyphenols, carotenoids, and antioxidants. Studies have shown that micro-broccoli can contain significantly more sulforaphane than the full-grown head, making it a true functional food.
5. Culinary Inspiration
Don't just use them as a garnish! Microgreens are versatile:
- Smoothies: Toss a handful of broccoli microgreens into your morning blend for a hidden nutrient boost.
- Tacos & Sandwiches: Radish microgreens add a peppery crunch that rivals any arugula.
- Pesto: Pea shoots make an incredible, sweet pesto variant when blended with olive oil and pine nuts.
Scaling Up: From Hobby to Side Hustle
Once you master the 7-day cycle, you might realize you are producing more microgreens than you can eat. Many urban gardeners transition into selling their excess harvest to local restaurants or starting a small farmer's market stand. A standard 10x20 tray can yield up to a pound of high-end microgreens (like spicy mustard or amaranth), which can retail for $20-$40 per pound. It requires meticulous sanitation and precise environmental controls, but it is one of the few crops that can be genuinely profitable in an apartment setting.
Common Pitfalls for First Timers
Even though microgreens are easy, failure is possible. Here are the most common mistakes:
- Sowing Too Thickly: Greed is the enemy of the microgreen farmer. If you sprinkle too many seeds, the resulting plants will suffocate each other, creating a damp mat that breeds mold instantly. Always weigh your seeds.
- Poor Quality Seed: Do not buy standard garden seed packets for microgreens. They are too expensive and sometimes treated with fungicides. Always buy bulk seeds explicitly marketed for sprouting or microgreen production.
- Harvesting Wet: Never harvest your greens right after watering them. Wet harvested greens will turn to mush in your refrigerator within 24 hours. Always harvest when the canopy is bone dry.
Conclusion: Start Small, Grow Big
You don't need a green thumb to master microgreens. You just need a routine. Start with one tray this week, and you'll never look at store-bought lettuce the same way again. It is the ultimate expression of urban self-sufficiency.