Don't throw way that 2-liter soda bottle. In 5 minutes, you can turn it into a self-watering planter that keeps herbs alive while you go on vacation.
Gardening can be expensive. Ceramic pots, drainage trays, and fancy self-watering systems add up. But sometimes the best design is free. The "Sub-Irrigated Planter" (SIP) is a fancy name for a system where water is stored in a reservoir below the soil and trapped upwards via a wick. You can build one with trash.
Materials Needed
- 1 Empty 2-Liter Plastic Bottle (cleaned)
- Scissors or X-Acto Knife
- A strip of cotton fabric (from an old T-shirt) or a thick string
- Potting Soil
- Seeds or seedling
Step-by-Step Build
Step 1: The Cut
Cut the bottle in half horizontally, about 1 inch above the label line (so the top part is slightly shorter than the bottom). Recycle the cap; you won't need it (or you can drill a hole in it, but going capless is easier).
Step 2: The Wick
Take your strip of cotton fabric. Thread it through the neck of the bottle top. Pull it so that half of the fabric is inside the "funnel" part of the top, and half is dangling out the spout.
Step 3: Assembly
Invert the top half into the bottom half. The spout should be pointing down into the bottom reservoir. The cotton wick should touch the bottom of the base.
Step 4: Plant
Fill the top part (the funnel) with potting soil. Make sure you hold the wick up so it runs through the center of the soil. Plant your seeds or transplant your seedling. Water it gently from the top to settle the soil.
Step 5: Fill the Reservoir
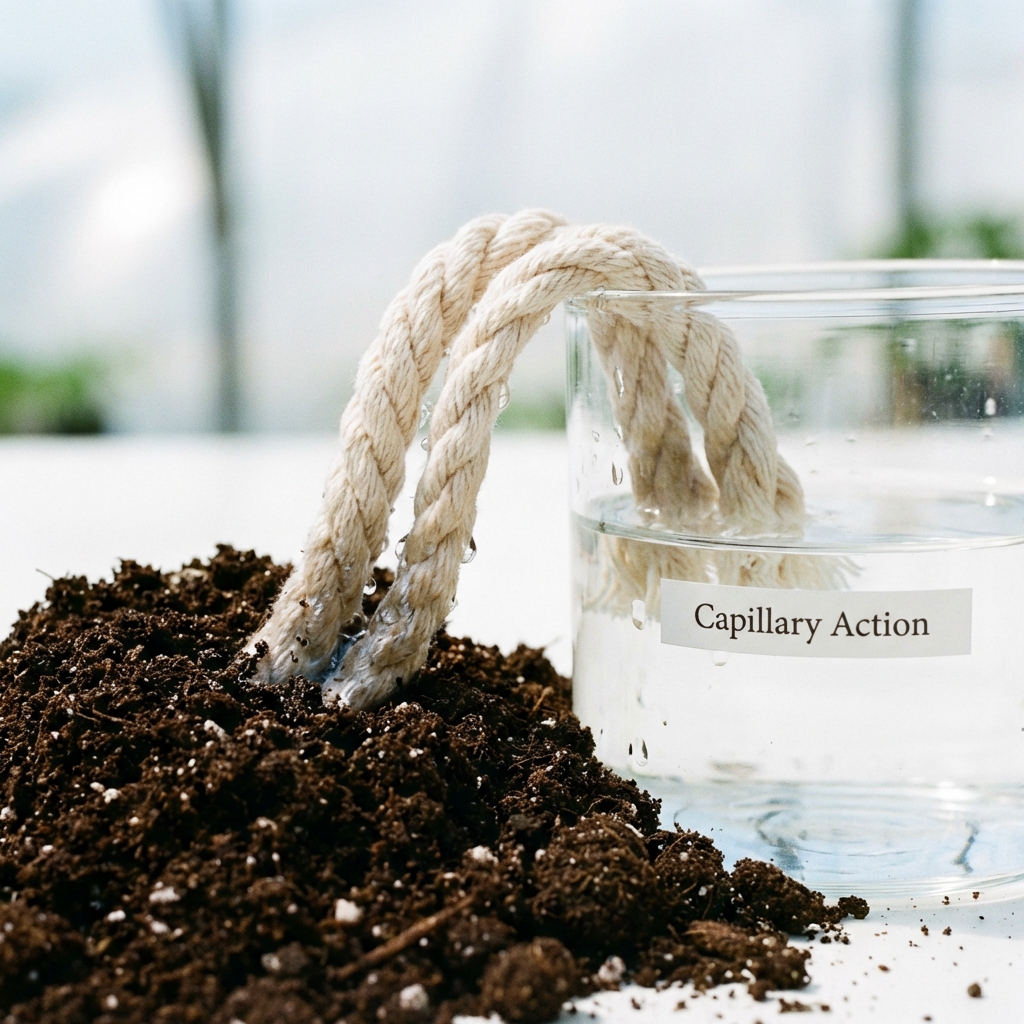
Lift the top half out, fill the bottom base with water, and drop the top half back in. The wick will drink the water and pull it up to the roots via capillary action.
Why It's Better Than Regular Pots
In a regular small pot, the soil dries out in hours. In this bottle planter, the water reservoir can keep the plant hydrated for 3-4 days. It is perfect for moisture-loving herbs like basil, parsley, and cilantro. Plus, you can see the water level through the plastic, so you know exactly when to refill.
Detailed Tips for Success
While the build is simple, there are a few "pro tips" that will make your bottle garden last for months instead of weeks.
1. The Wick Matters
Not all fabrics are created equal. Synthetic materials (like polyester) don't wick water well. You want 100% cotton. Old t-shirts, cotton shoelaces, or even strips of a cotton towel work best. Before installing, soak the wick in water so it starts pulling moisture immediately.
2. Algae Control
Since the bottle is clear, sunlight will hit the water reservoir. This inevitably leads to green algae growth. While algae isn't inherently harmful to mature plants, it looks gross and can steal nutrients. Pro Tip: Wrap the bottom half of your bottle in duct tape, aluminum foil, or paint it. This blocks the light and keeps your roots/water clean.
3. Soil Selection
Do not use "Garden Soil" or dirt from your yard. It is too heavy and will turn into mud in a self-watering system. Use a lightweight "Potting Mix" usually containing peat moss, perlite, and vermiculite. The perlite (white rocks) helps keep the soil fluffy so roots can breathe.
What Can You Grow?
A 2-liter bottle is small, so you need to be realistic. You won't be growing a watermelon.
- Best: Basil, Cilantro, Mint, Parsley, Spinach, Lettuce.
- Okay: Small chili peppers (like Thai chili), Strawberries.
- Avoid: Tomatoes (roots are too big), Root vegetables (carrots need depth).
Troubleshooting
Soil is too dry? Your wick might be clogged or not touching the water. Top-water the plant once to re-establish the capillary flow.
Soil is sopping wet? The soil might be too dense. Mix in more perlite next time.
Plant is wilting? Check the reservoir! It's easy to forget to refill it because it lasts so long.
Conclusion
This project proves that you don't need a lot of money to start a garden. With a piece of trash and a handful of dirt, you can grow food on your windowsill. It's a great science experiment for kids and a practical way to keep fresh herbs in your kitchen year-round.